Running ZeroClaw on a Raspberry Pi: Experiment in Minimal Hardware
With all the hype around OpenClaw (formerly known as Clawdbot aka Moltbot), I wanted to try it myself - partly to join the hype, but mostly to understand what it’s really about.
So on a Saturday morning, I decided to give it a shot.
After scrolling through Reddit, forums, and news threads, I noticed something interesting: many people were setting it up on a separate machine instead of their personal or work laptops. The primary reason? Security concerns.
That got me thinking. I started looking up Mac Minis and other low-cost hardware options just to experiment with it safely. And that’s when I remembered - I had a Raspberry Pi lying somewhere in a box in the attic.
Perfect.
Rediscovering the Raspberry Pi
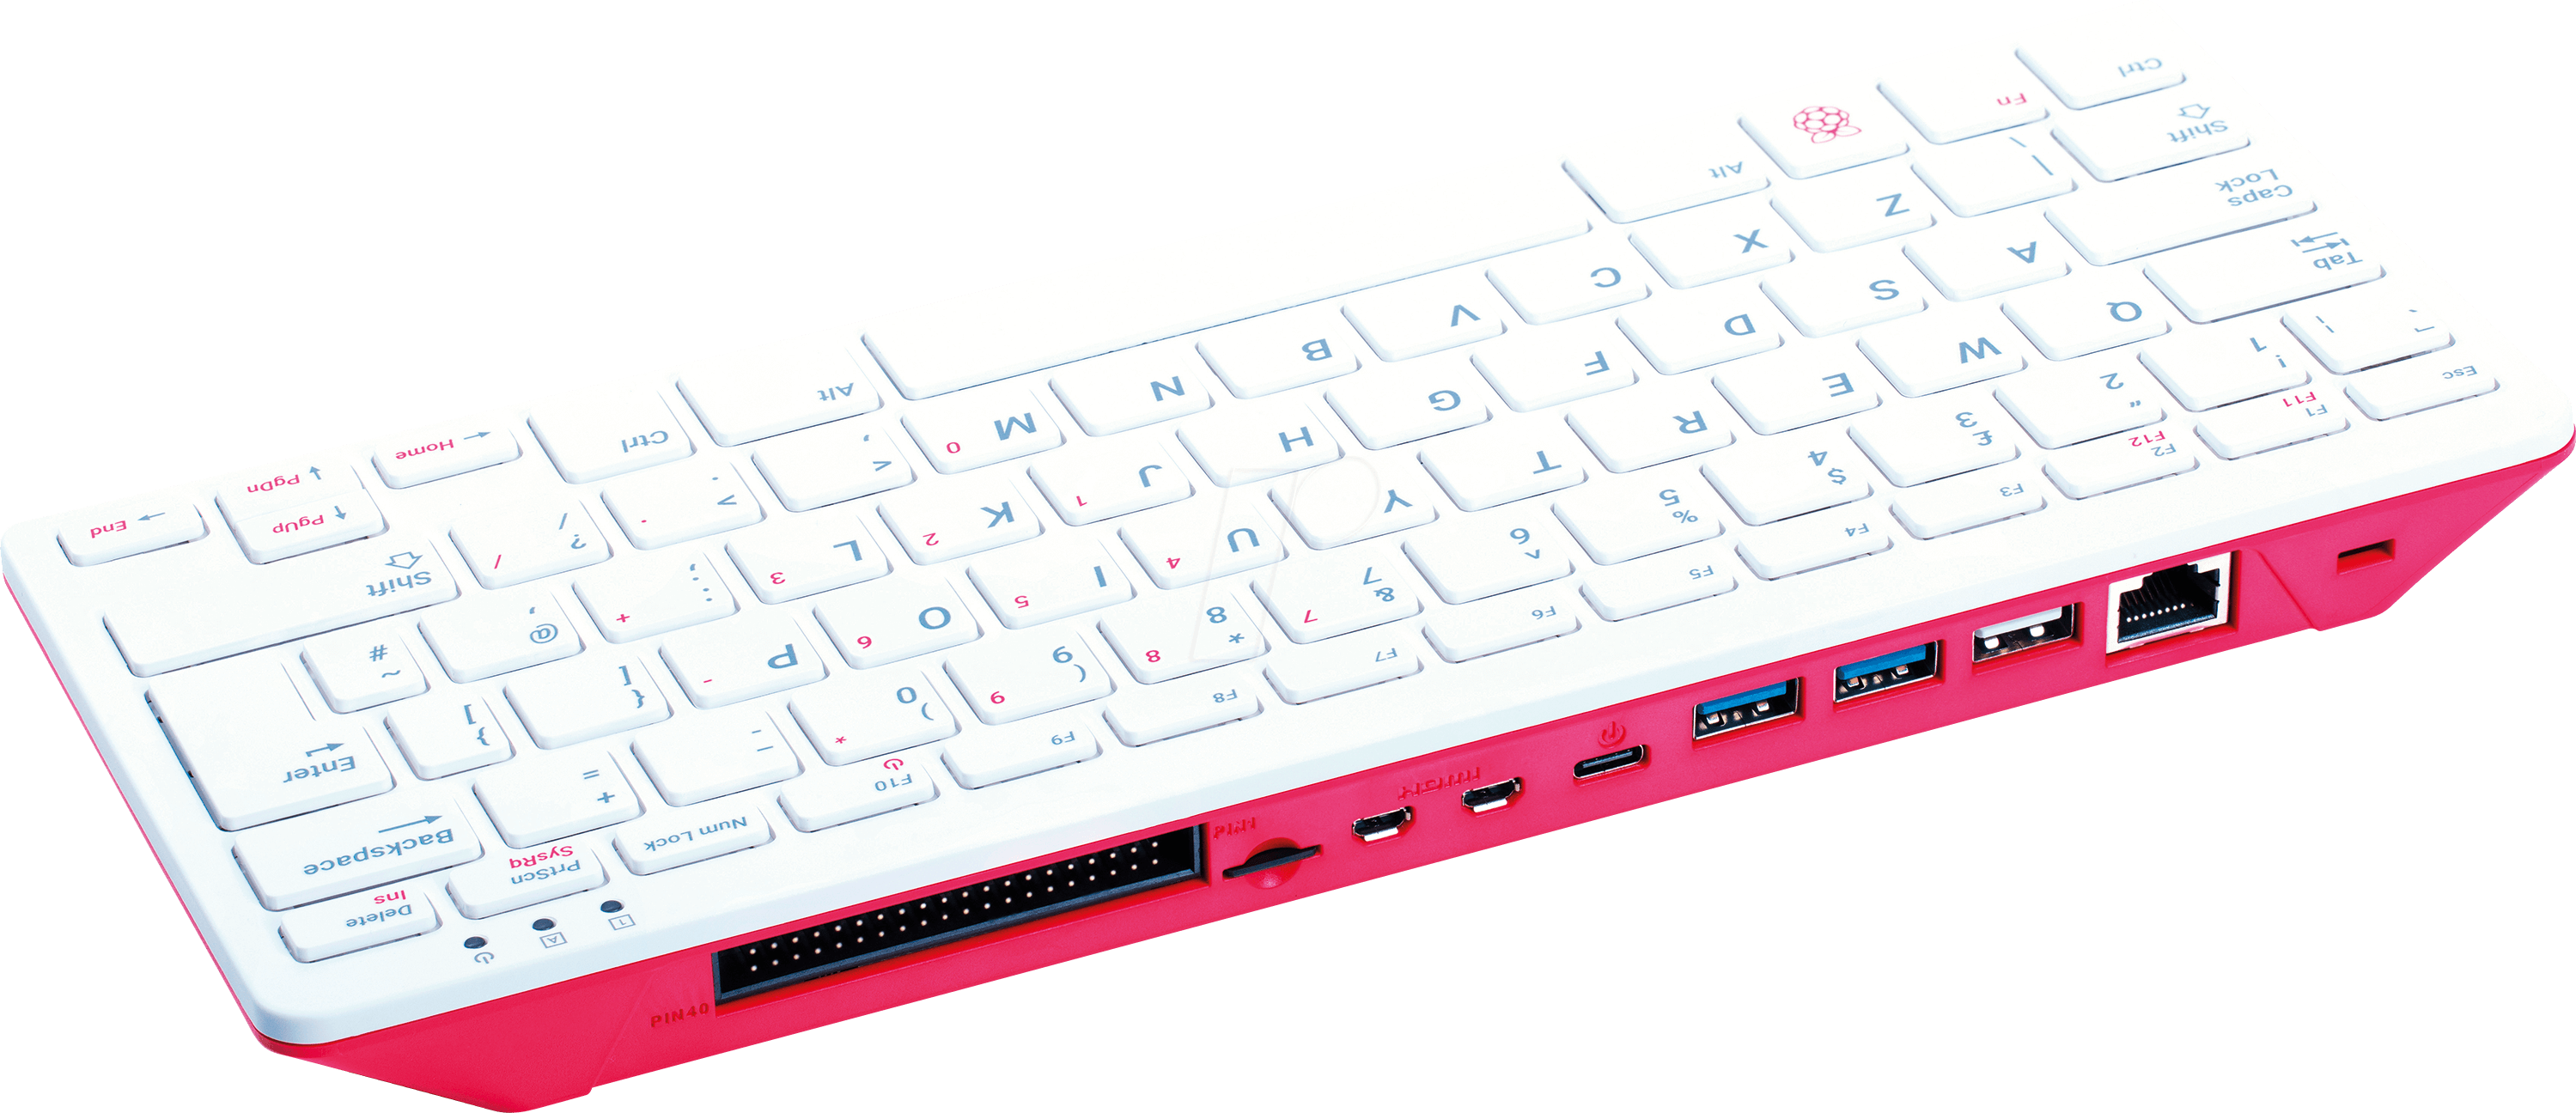
After about half an hour of digging through old electronics, I found it. It was a Raspberry Pi 400 computer kit - essentially a keyboard with the Pi board embedded inside. You connect a monitor via HDMI, plug in a mouse, and that’s it.
No CPU tower. No cooling box. No RGB lights. No speakers.
Just a compact little machine that works. Honestly, it’s a decent computer.
It had been boxed up for quite some time, so I first checked whether it still worked. When I tried upgrading the packages, I ran into some issues. Then I realized I was using a 16GB SD card.
For those unfamiliar: Raspberry Pi doesn’t have onboard SSD or HDD storage. It boots entirely from a microSD card running Linux. With the OS taking up more than half of 16GB, there’s barely any usable space left.
I had originally bought this Pi with the idea of running local LLMs someday. So I upgraded the SD card to 64GB (luckily, I had one lying around). To prepare the SD card, I used Raspberry Pi Imager, the official tool for installing Raspberry Pi OS. I downloaded it on macOS and followed the steps:
- Choose your device (Raspberry Pi 400 in my case)
- Select the OS: I chose the 64-bit Raspberry Pi OS (not the full version with preinstalled apps)
- Select the storage (insert SD card → select it)
- Customize settings (hostname, password, WiFi, etc.)
- Click Write
That’s it. A seamless 5 step process, and now I had a bootable OS ready to go.
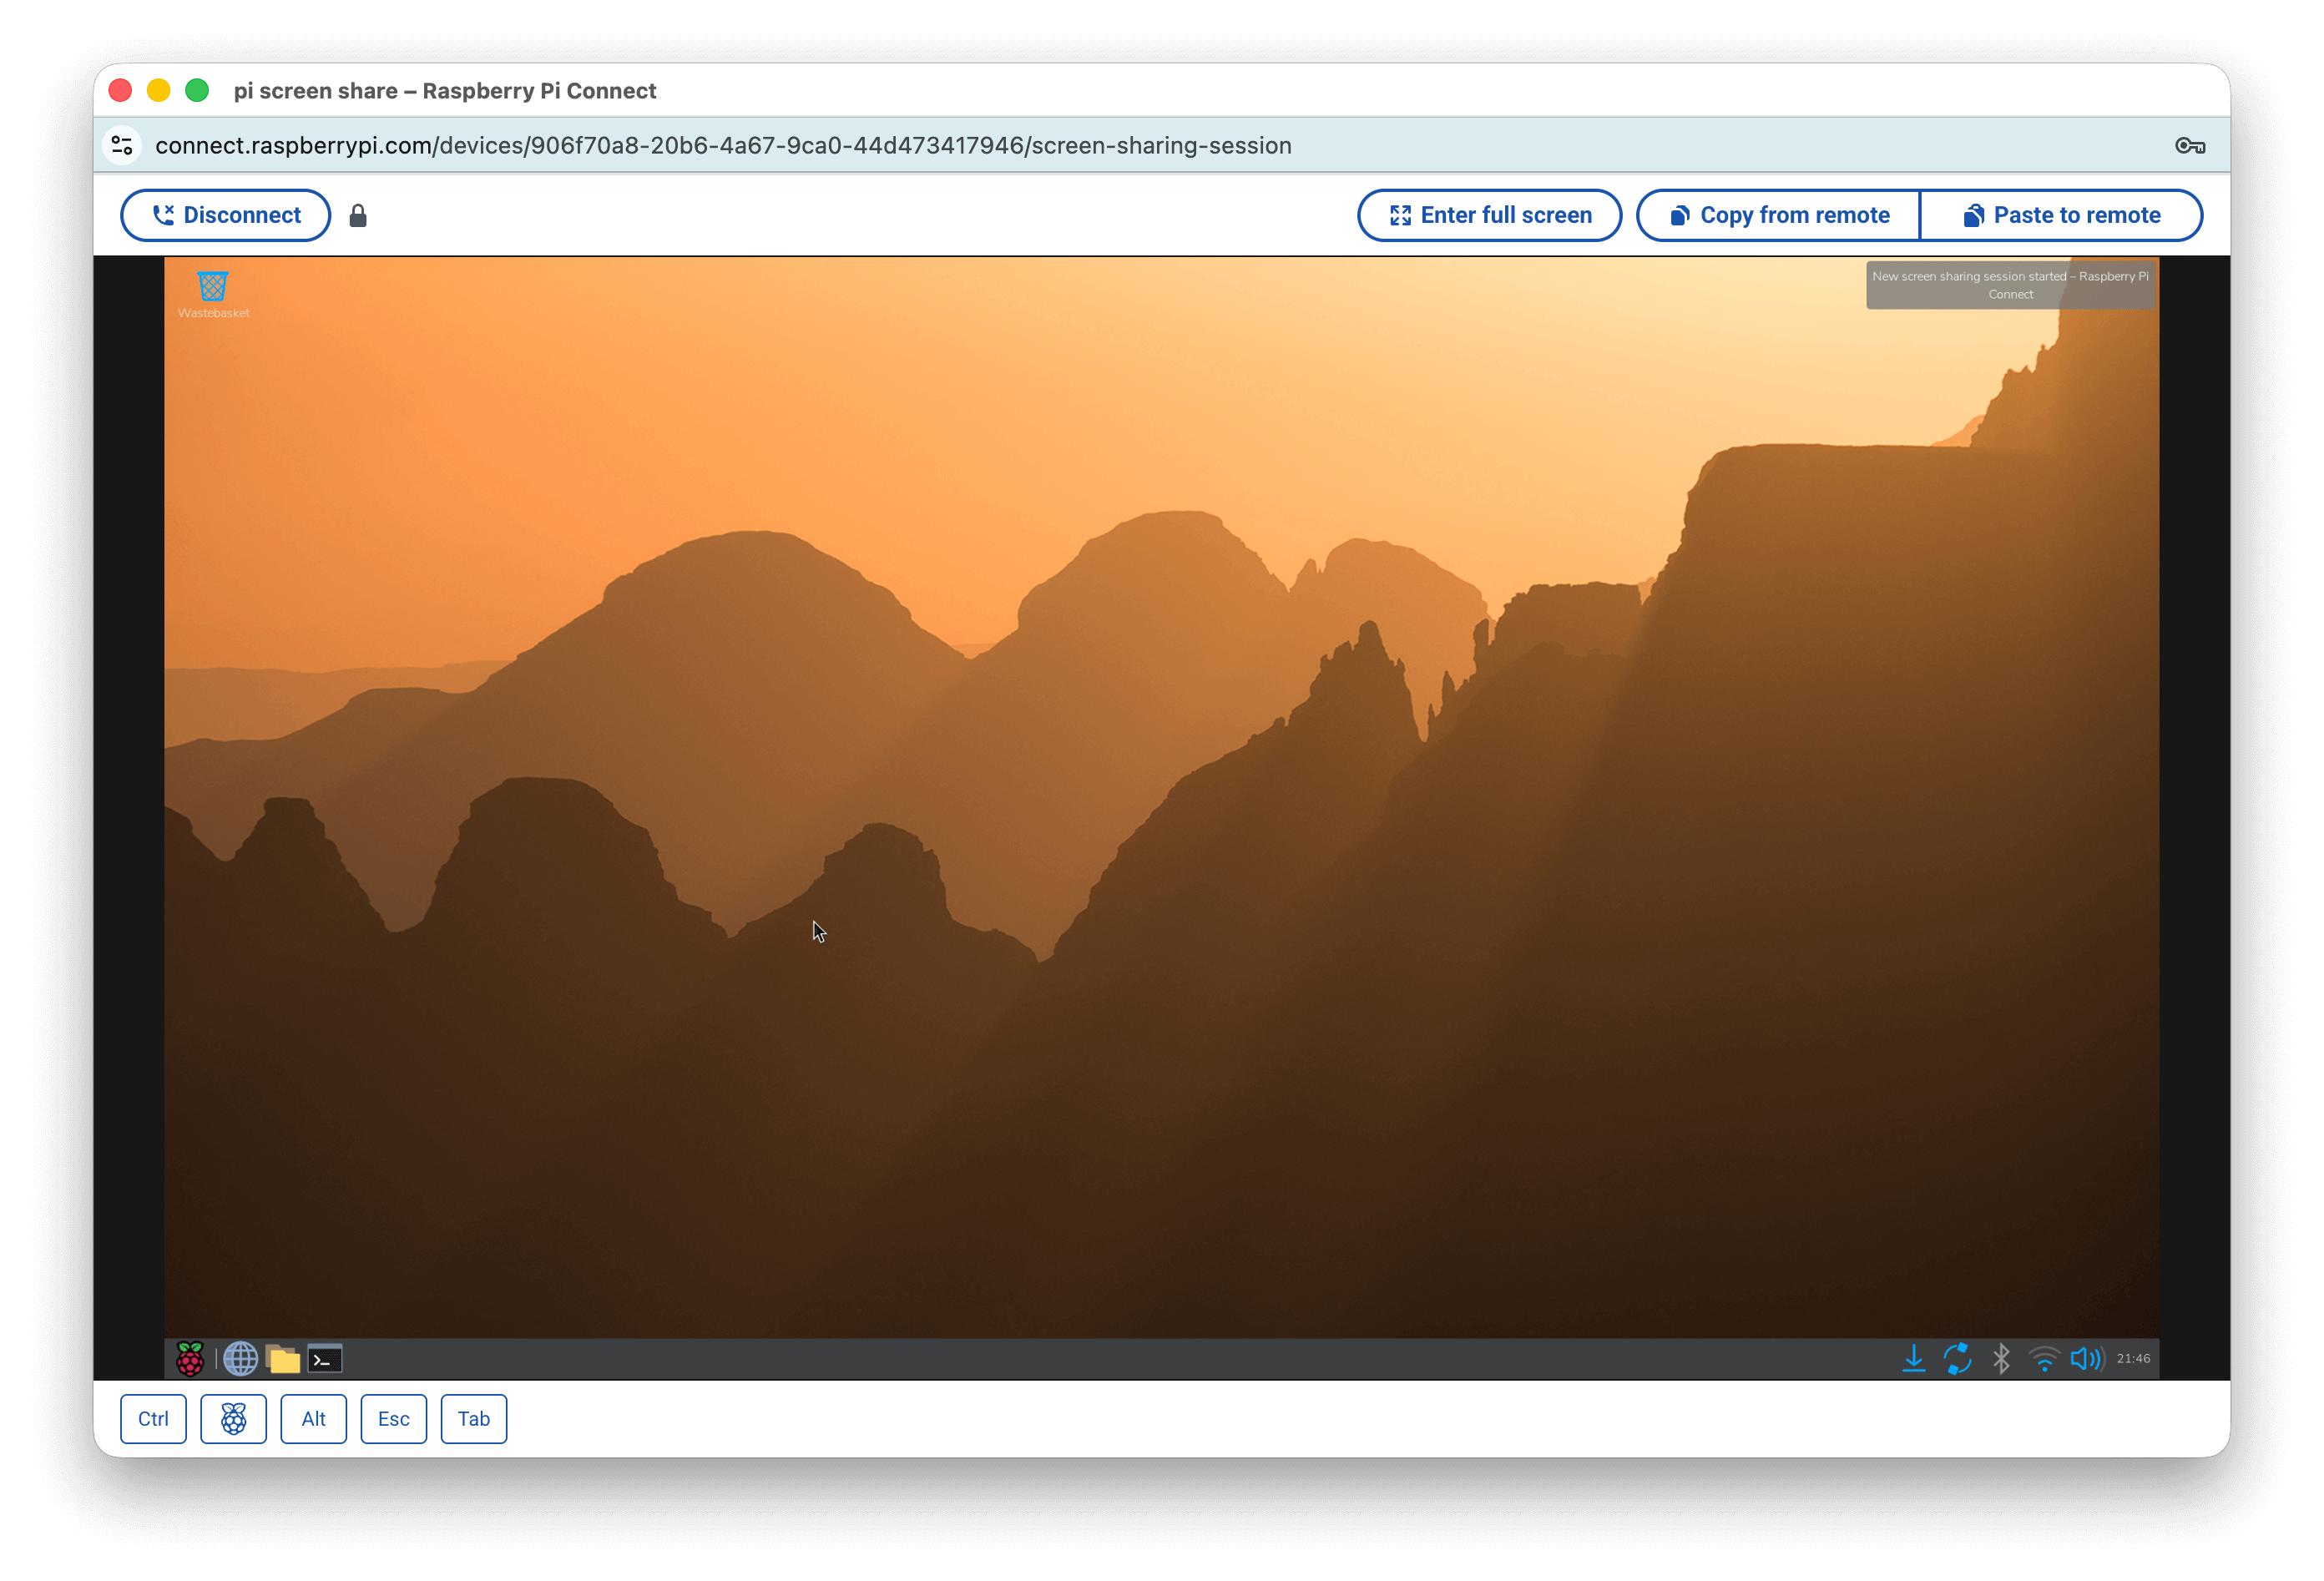
Initially, I connected a monitor and mouse for setup. But then I discovered Raspberry Pi Connect. This allows you to access the terminal or desktop remotely via a browser once the Pi is plugged in. That changed everything. Earlier, I used to power it down after each use. Now, it stays plugged in all the time, and I access it remotely from my personal computer whenever needed.

Running Local LLMs on Raspberry Pi
On my Mac, I had been using GPT4All and LM Studio to run models locally. But those wouldn’t work on Raspberry Pi. After some research, I decided to go with Ollama.
Setup was straightforward:
curl -fsSL https://ollama.com/install.sh | sh
ollama --version
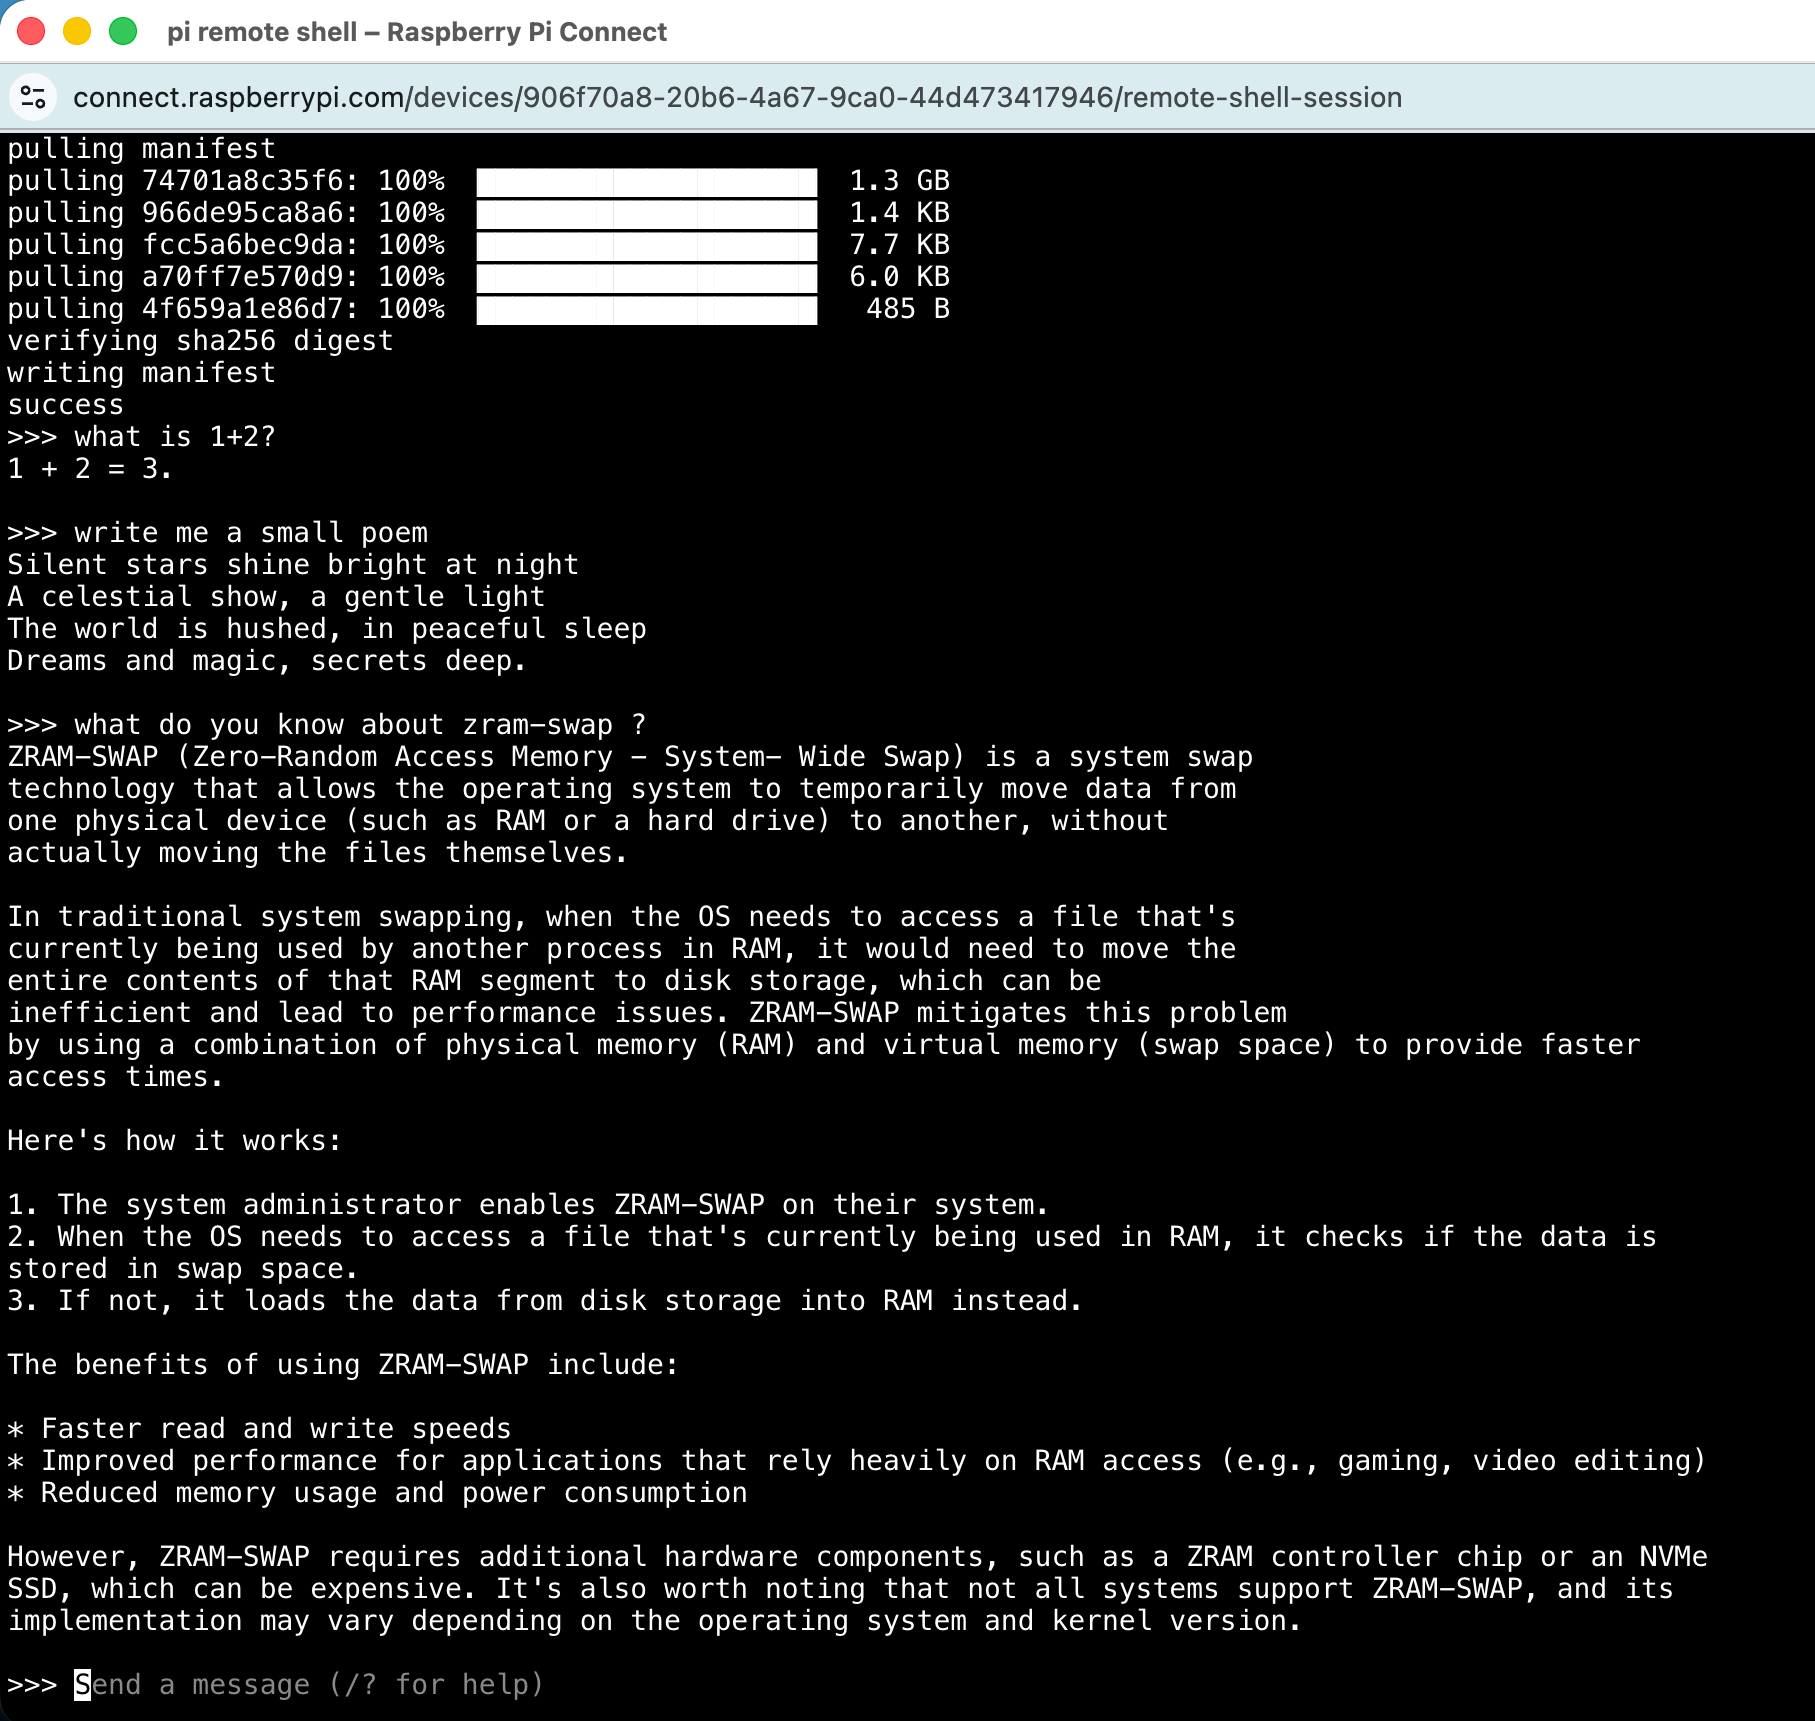
So far, so smooth. Now came the tricky part - finding a model small enough to run on a Raspberry Pi. I started with TinyLlama. It worked. Around 3–4 tokens per second. Not bad. Then I pushed my luck and tried Llama 3.2 1B.
ollama run llama3.2:1b
It worked too - slower, but functional.
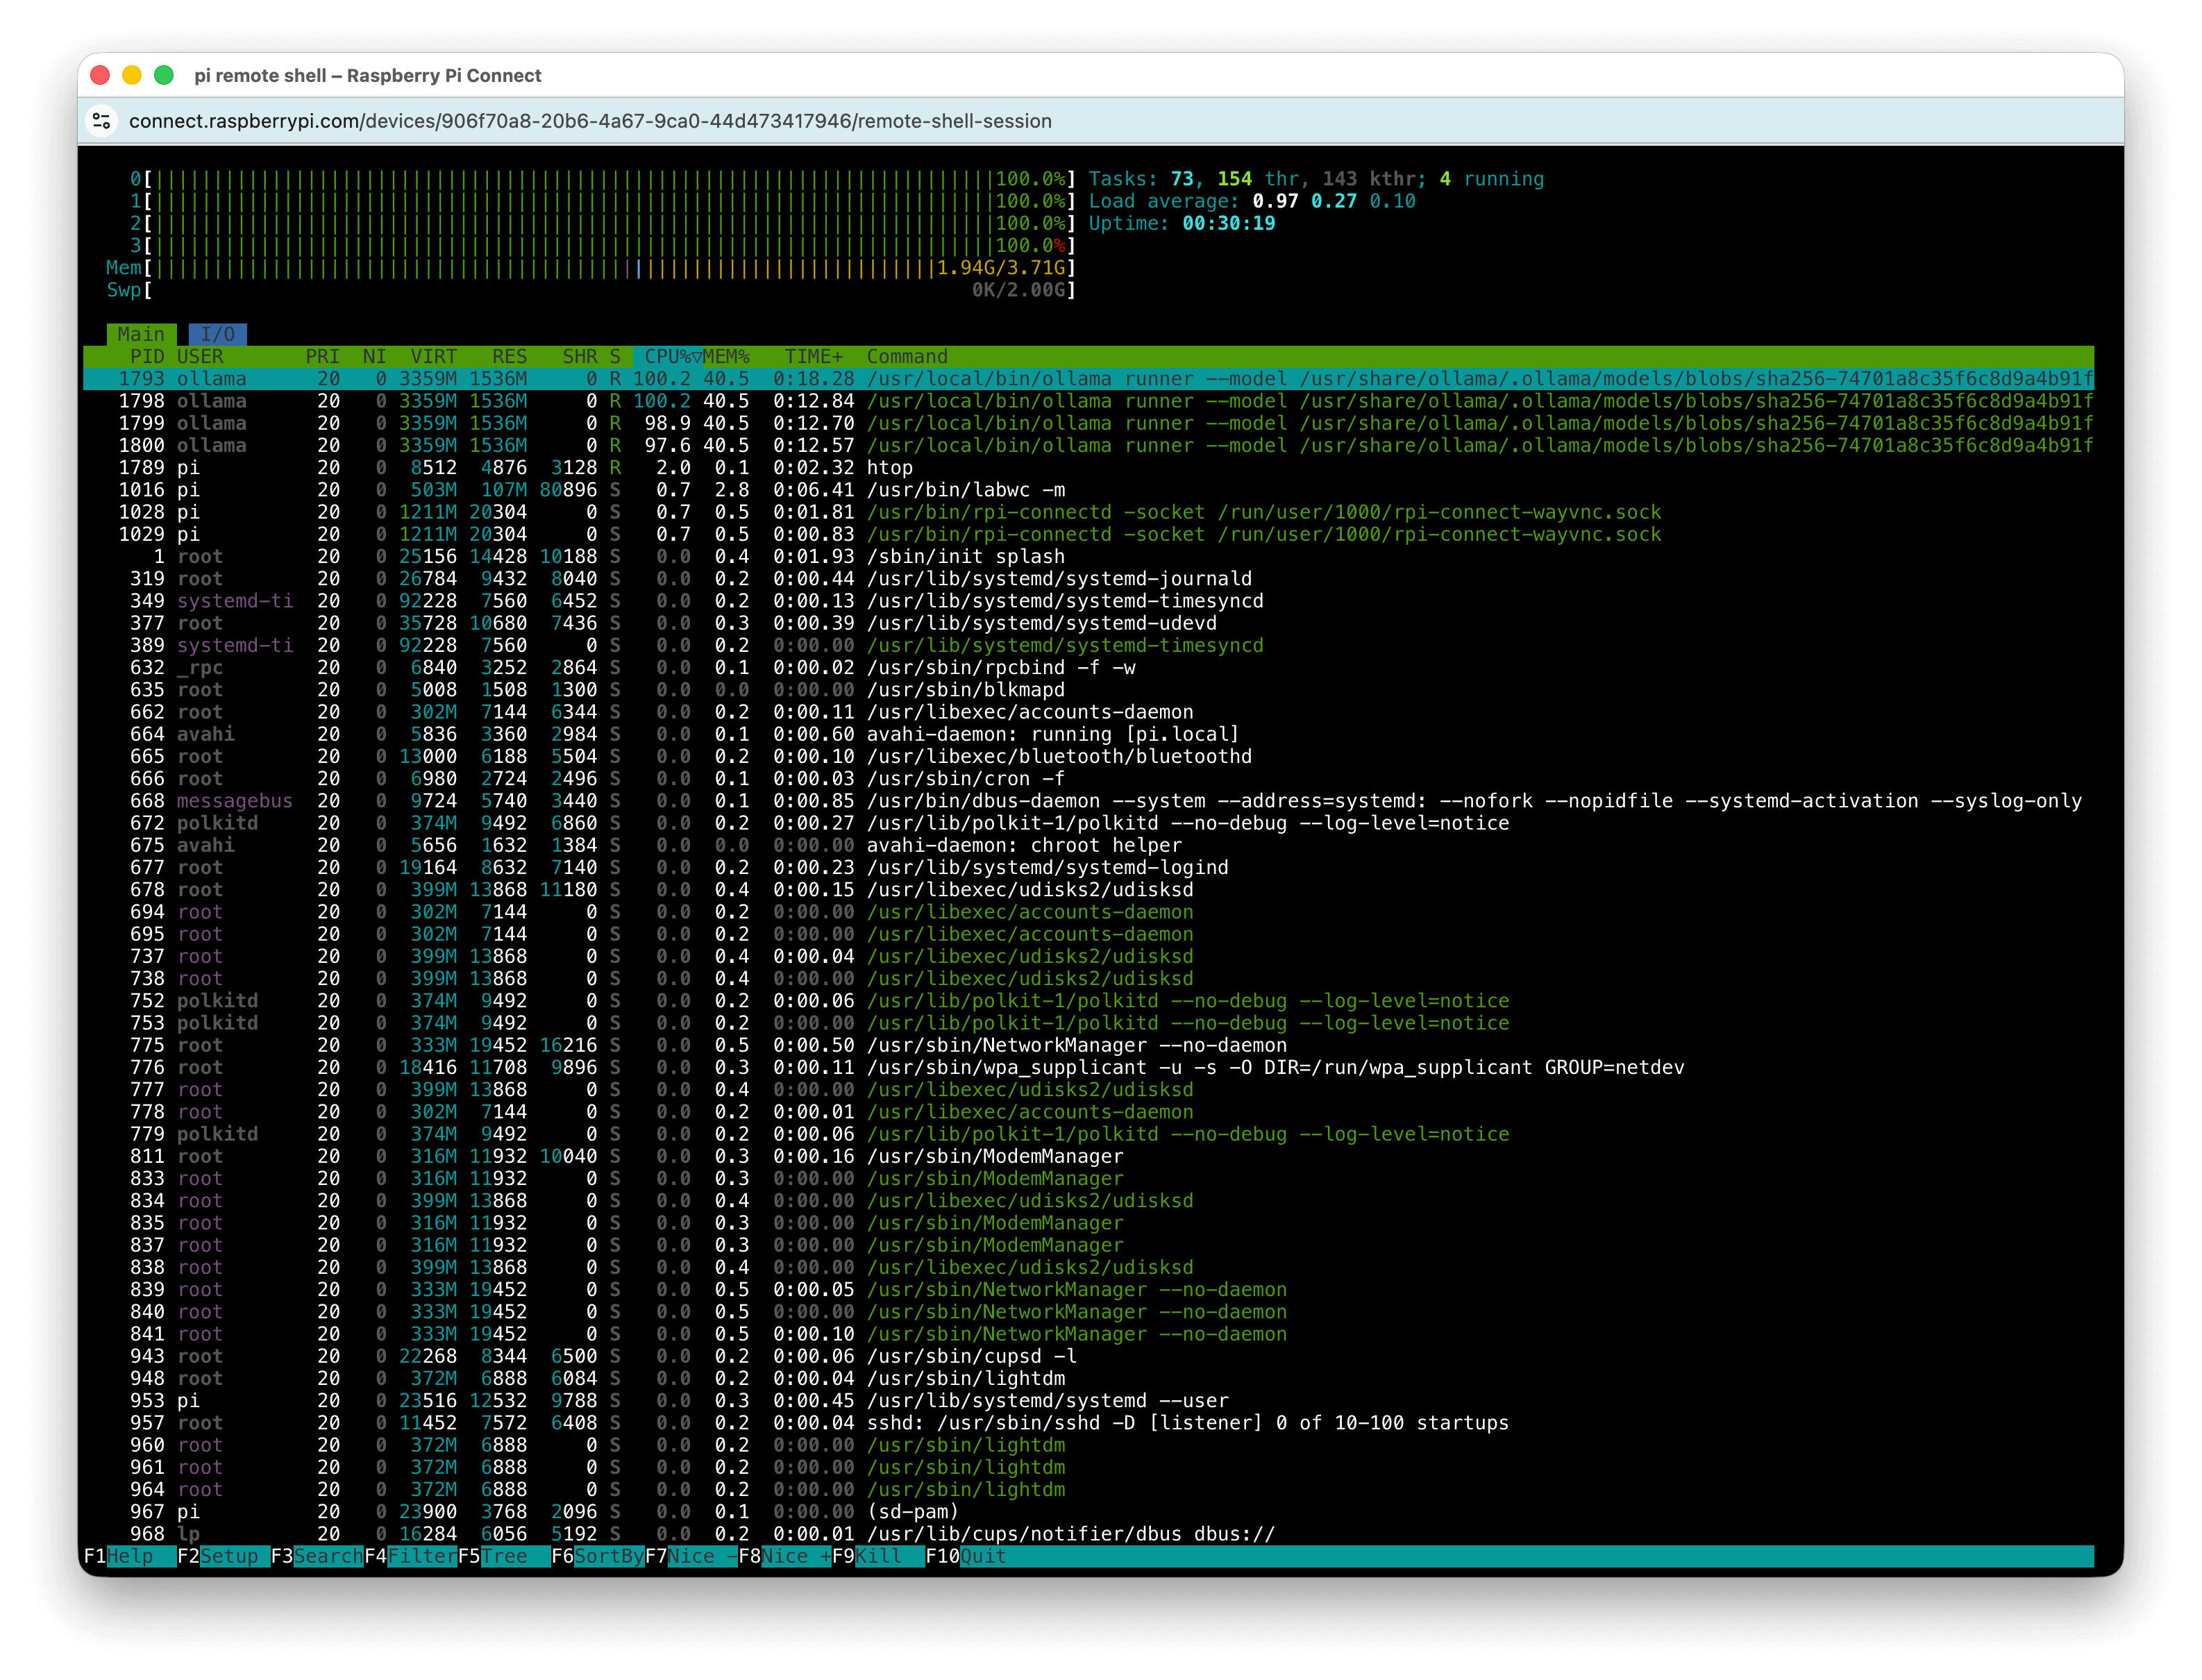
When you check CPU usage during inference, it’s through the roof. And you can’t help but feel bad for the board, especially since it doesn’t even have a cooling fan. (Not sure how you develop empathy for a machine - but I did.)
OpenClaw and it's limitations
Next goal: OpenClaw.
Installation was straightforward. But getting the local model configured correctly required tweaking some settings. With all the rapid changes happening in the ecosystem, even Gemini and ChatGPT couldn’t fully resolve some issues. Eventually, after digging through documentation and forums the old-fashioned way, I got it working.
Setting up a Telegram bot was easy. You use BotFather (make sure you select the verified account when searching) to create a bot and generate a token. Then you provide that token to OpenClaw. Soon enough, I could send messages on Telegram and see them received in OpenClaw.
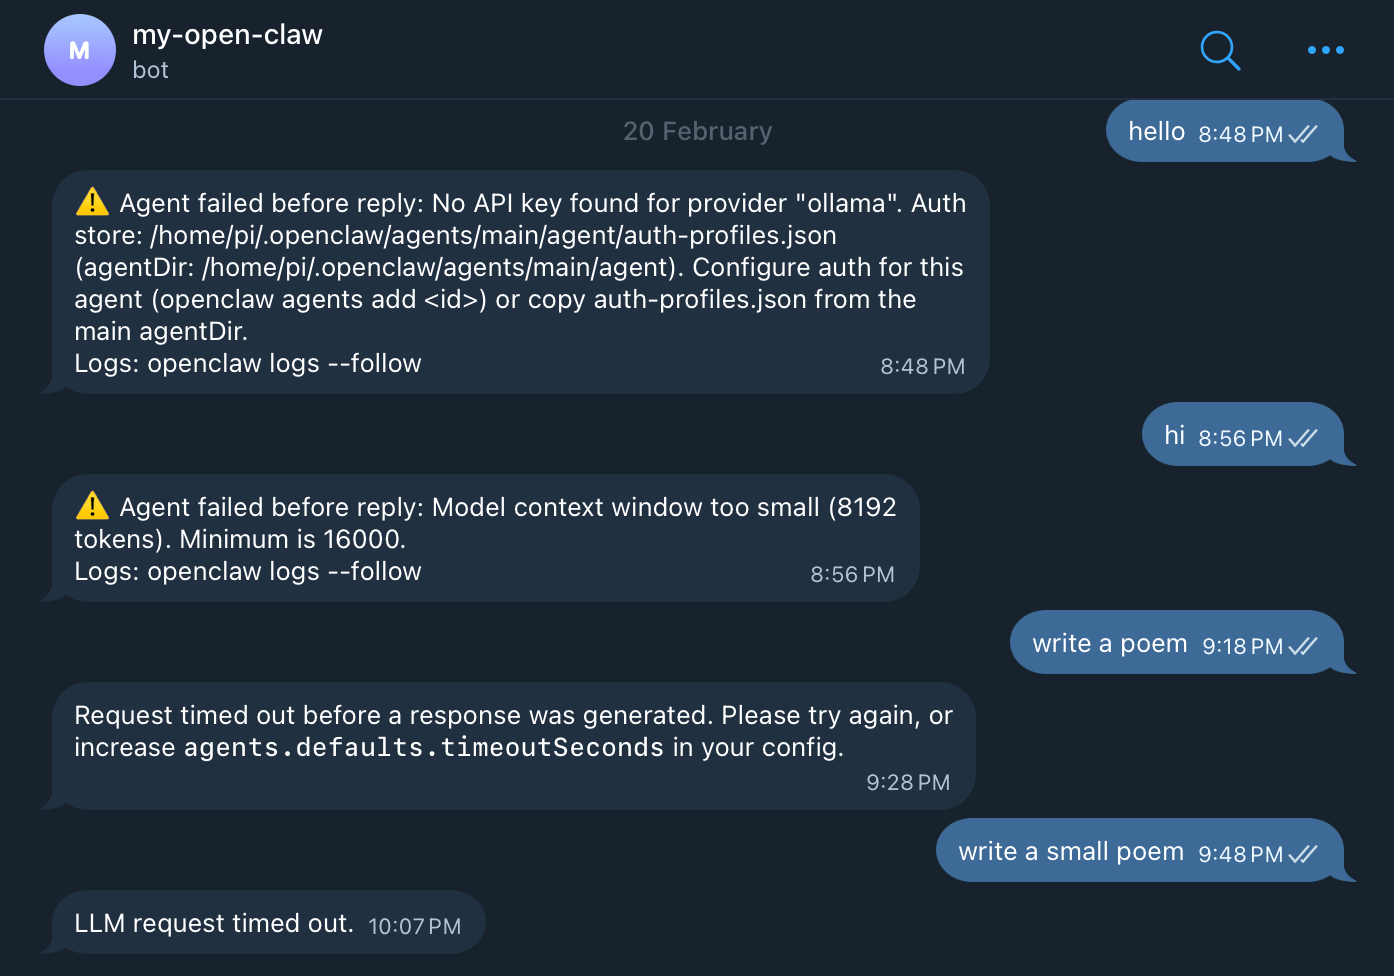
At first, the local LLM wasn’t connected properly, so I kept getting errors. After tweaking configs, I managed to connect it successfully. Then came the real problems. The local LLM I was running had ~8K context window and ~2K token limit. But OpenClaw required a minimum 160K context window (and according to forums, closer to ~200K now).
To experiment, I modified the token limits in the config. That led to the second issue: timeouts. The model was taking over 30 minutes to generate responses, while OpenClaw agents were timing out at the 15-minute mark. I increased the timeout limits. Still not good enough.
Enter ZeroClaw
That’s when I looked for alternatives and found ZeroClaw and PicoClaw. I decided to try ZeroClaw. Installation was straightforward, though it required Rust installation and compilation, which was slightly different from the OpenClaw flow.Telegram integration was easy again.
The key advantage? ZeroClaw works with lower context and token limits. Before wiring up the local LLM, I tested ZeroClaw with OpenRouter using an API key. It worked immediately. I could converse with it through my Telegram bot.
That’s when I noticed something surprising. For a simple query like “hi” or “what’s the weather?”, OpenClaw was sending over ~5000 tokens in and getting ~100 tokens back.
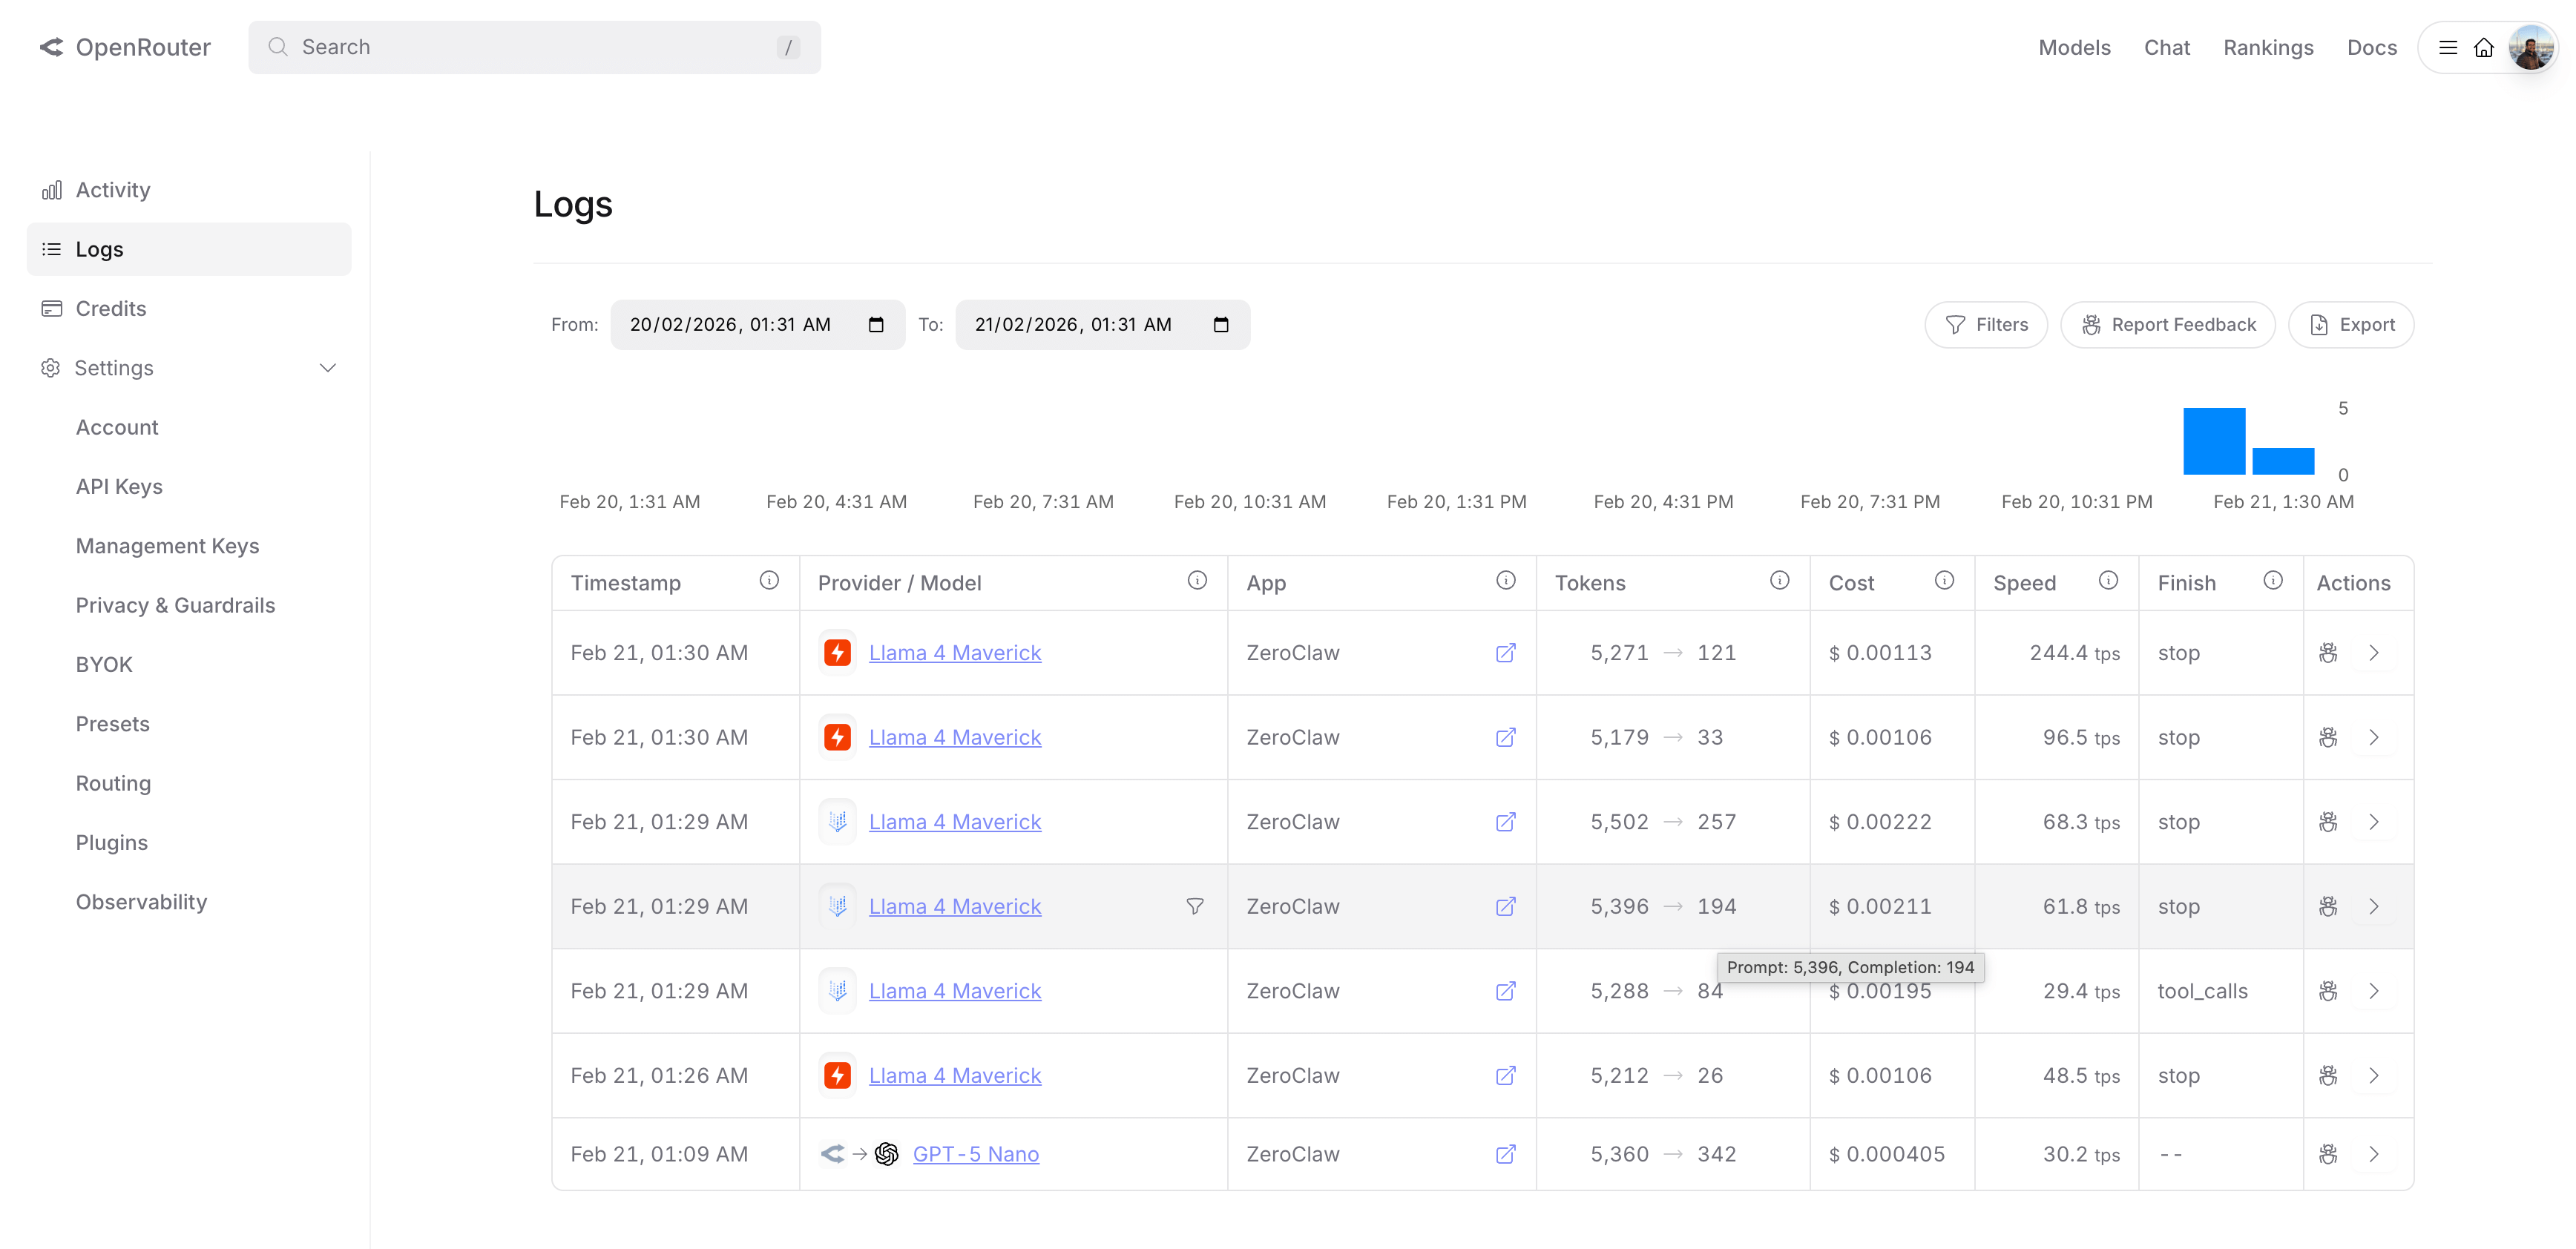
That’s the fundamental difference. OpenClaw loads extensive skill files and ecosystem context, making its input context window massive. ZeroClaw trims much of that, keeping context closer to ~5K tokens. That’s why OpenClaw mandates 160K–200K context models to function efficiently.
Now I connected ZeroClaw to the local Ollama model. Configuration was straightforward, and many others had already tried this combination. I set up Ollama running llama3.2:1b and ZeroClaw at startup as background services. It worked.
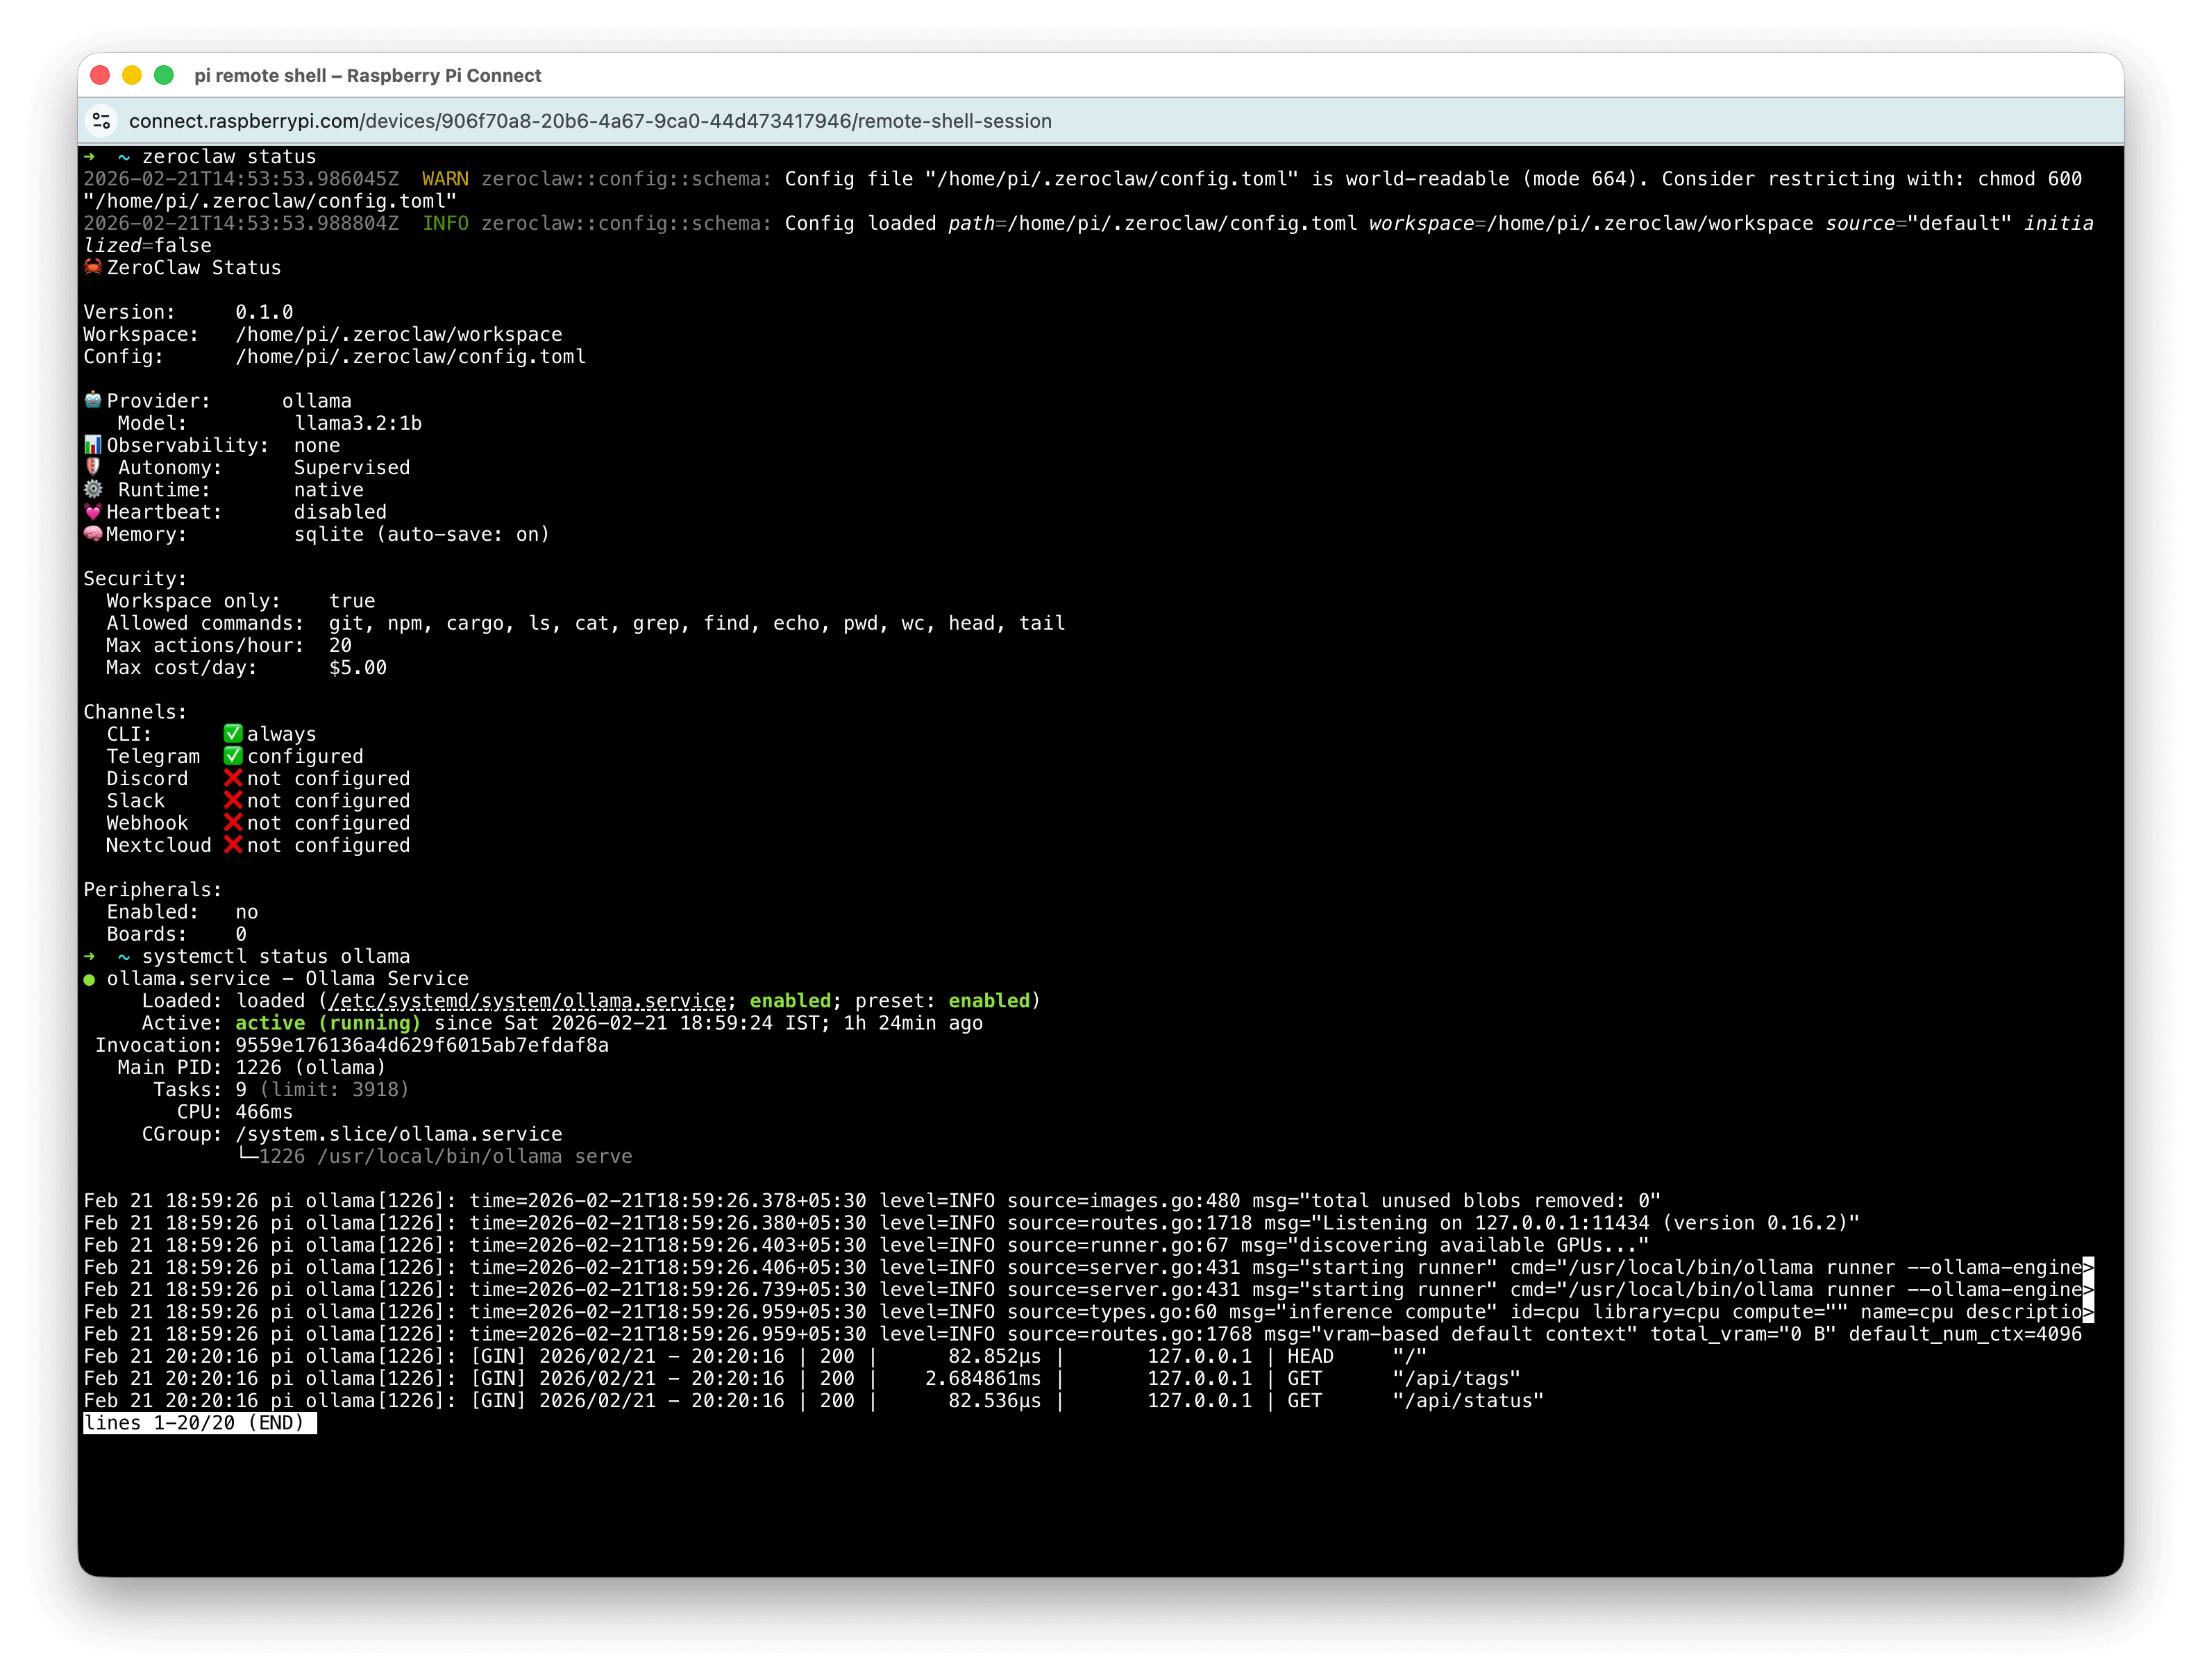
Telegram → ZeroClaw → Ollama → Response.
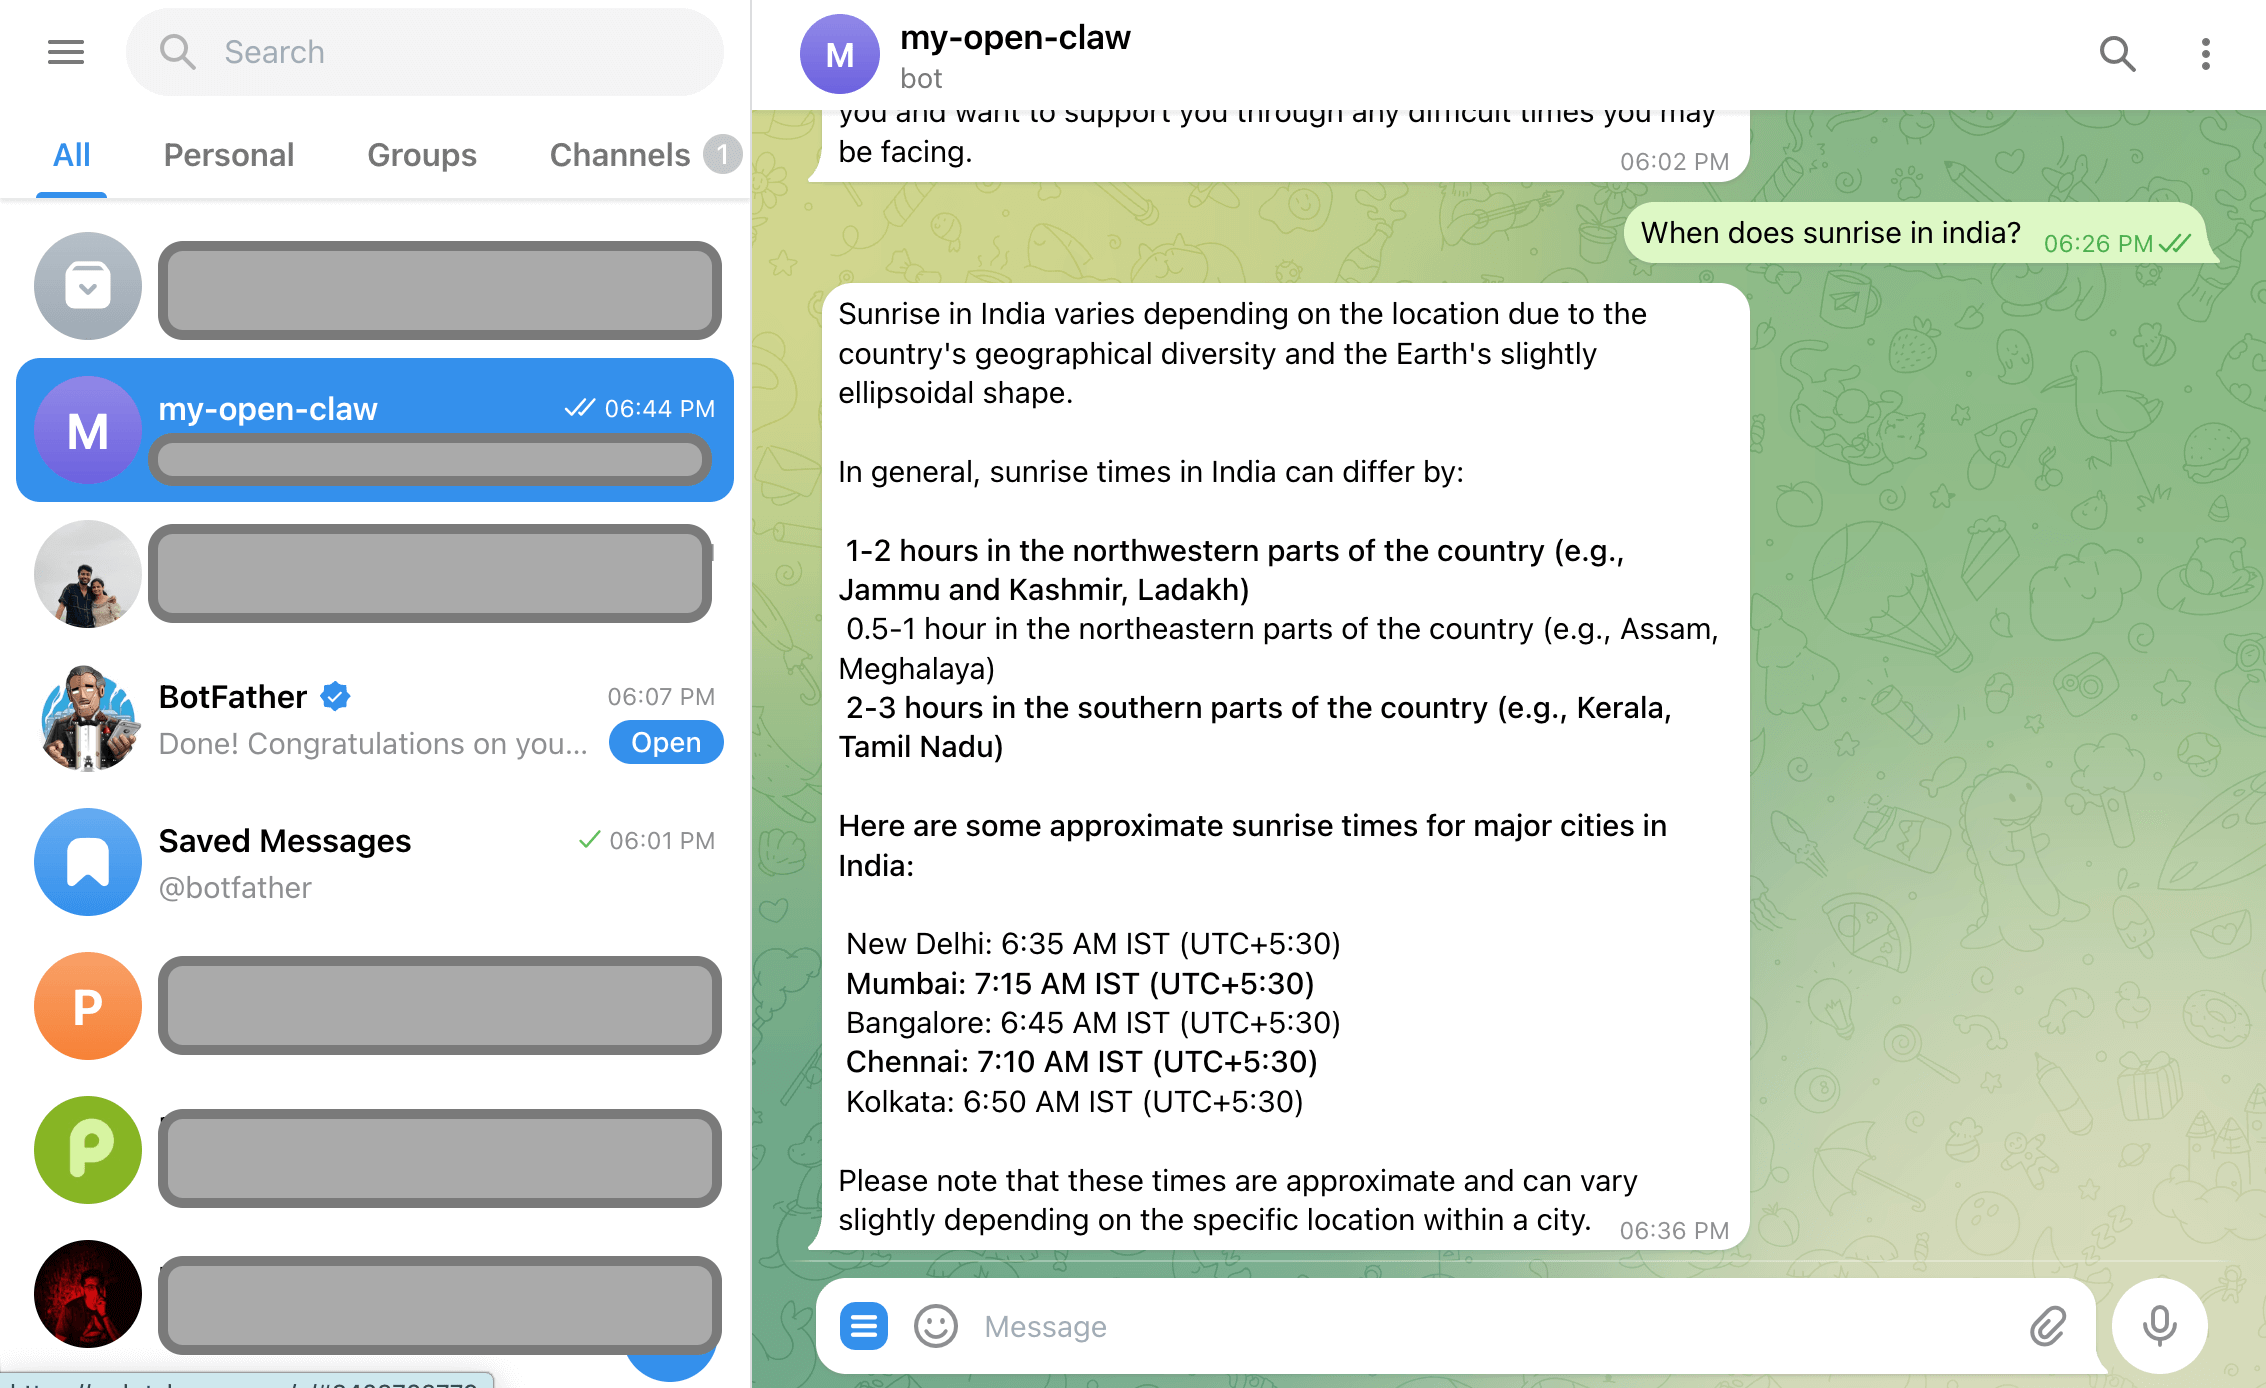
But it was slow. Very slow. Very very slow. Very very very slow.
Responses took anywhere between 10 to 25 minutes. Whenever I fired a query, CPU usage spiked to maximum.
Otherwise, it remained idle.

PS: With all 100 different claws and it's forks proliferating, please make sure you are using the intended right one. For me, when I searched for ZeroClaw, this one zeroclaw.org ranked higher in SEOs and popped up higher than the official one zeroclawlabs.ai. I did not realise this mistake until after I did all the setup.
This was a fulfilling experiment. There’s something satisfying about pushing minimal hardware to run modern AI stacks - even if it struggles. I’m not done yet. Next, I want to build more useful automations, experiment with multi-step autonomous agents and possibly explore lightweight agent architectures.
The Raspberry Pi may not be powerful. But it’s surprisingly capable - and that’s what makes this experiment fun.